What do you need to know about balcony waterproofing?
Do you have a balcony that requires a waterproof membrane? This is a vital step in sealing a balcony to ensure It does not allow any water to penetrate your house and cause costly water damage.
In this article, we will tell you the main steps to take to ensure your balcony is waterproofed correctly. Please note, that SCR does not recommend this as a DIY project – but recommends you engage a Certified Water-proofer, to ensure your balcony receives a Waterproofing Certificate.
The following guidelines are from the Australian Standards for Waterproofing membranes for external above-ground use AS 4654.2-12.
Membrane Systems:
There are 5 types of Waterproof Membrane systems available for external above ground use;
- Ballasted Membranes
- Fully bonded membranes
- Inverted roof membrane assemble (IRMA system)
- Mechanically fixed membranes
- Partially bonded membranes.
As SCR are Waterproofers and Tilers – we install a membrane system to be used in conjunction with an Overlay (Tiles). Therefore we use system #(2) Fully Bonded Membrane System (a liquid membrane system).
The Process of Waterproofing a Balcony
-
Substrate
Ensure the substrate material the membrane is going to come in contact with is suitable for and compatible with the membrane system.
The substrate is to be resistant to moisture damage, and any form of particleboard sheeting shall NOT be used.
Ensure the substrate is clean, dry and free from dust and contamination (priming may be required for some types of membranes.
-
Membrane
Apply your chosen membrane as per the Manufacturer’s specifications. SCR uses a liquid Membrane and applies 2x coats of Membrane with a poly-cloth system. If a screed is required, SCR will install another 2x coats of Waterproof membrane on top of the screed and allow to set.
Ensure you protect your membrane from traffic during coats and after final coat during curing time.
If your chosen membrane system is sensitive to moisture – ensure it is not installed when rain has been forecasted during curing.
-
Fillets
Fillets shall be used where a membrane changes from the horizontal to a vertical plane. (such as where a balcony floor meets the side walls) For liquid membranes this should be a 15 x 15mm fillet/bond breaker.
-
Termination of Membrane (upward terminations -height)
Where your membrane termination is to prevent water entry, the finished height of the membrane above the finished surface level shall be sufficient to prevent water flowing over the top.
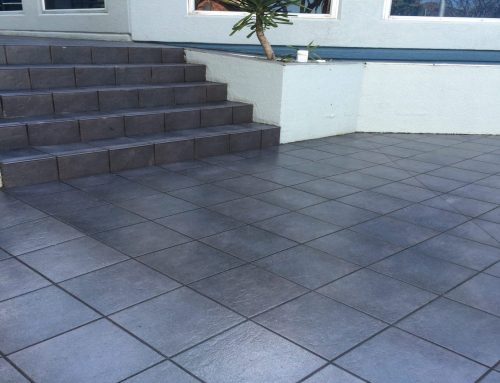
On balconies where tiles are being laid – SCR would recommend returning the membrane 70-180mm up the wall depending on skirting tiles being used.
-
Drains
On a balcony, the membrane should be connected to the storm water drainage system through a turn-down of the membrane into the inlet of the system. (applicable only where the balcony has a centre drain or strip drain system)
-
Overlaying Surface Finishes
Where a membrane is to be overlayed with another system (your Tiles), the overlaying system (tiles ) shall be compatible with, and not cause damage to, the membrane.
This is why SCR always advises that you have the same Company install the Membrane AND the Tiles – to avoid Tradesmen unfamiliar with each other’s systems. This eliminates the risk of a Tiler damaging your membrane when tiling, or a Waterproofer installing a membrane system not compatible with Tiles.
-
Inspection and Certification
Upon completion of the membrane installation and after appropriate curing time, the membrane should be inspected and the dry-film-thickness to be tested by non-destructive means.
At this stage SCR will provide its clients with a Waterproofing Certificate to confirm the balcony has been waterproofed to the above Australian Standards AS4654.2-2012.
Not sure what’s happening on your balcony? Don’t worry, SCR’s experts will diagnose the issue with a free, no-obligation inspection and quote. Get a quote today!